Prospect Follow-Ups
Prospect Follow-Ups in GoReach help your team stay on top of every person you have reached out to. When a team member logs an outreach interaction with a scheduled follow-up date, Passport creates a follow-up task automatically. You can also create them by hand. Either way, your staff can claim, complete, or reassign tasks from one shared view.
What you need
- Access to the Outreach section in Passport
- At least one prospect or visitor record in your database
Open the Prospect Follow-Ups tab
- In Passport, open Outreach in the main navigation.
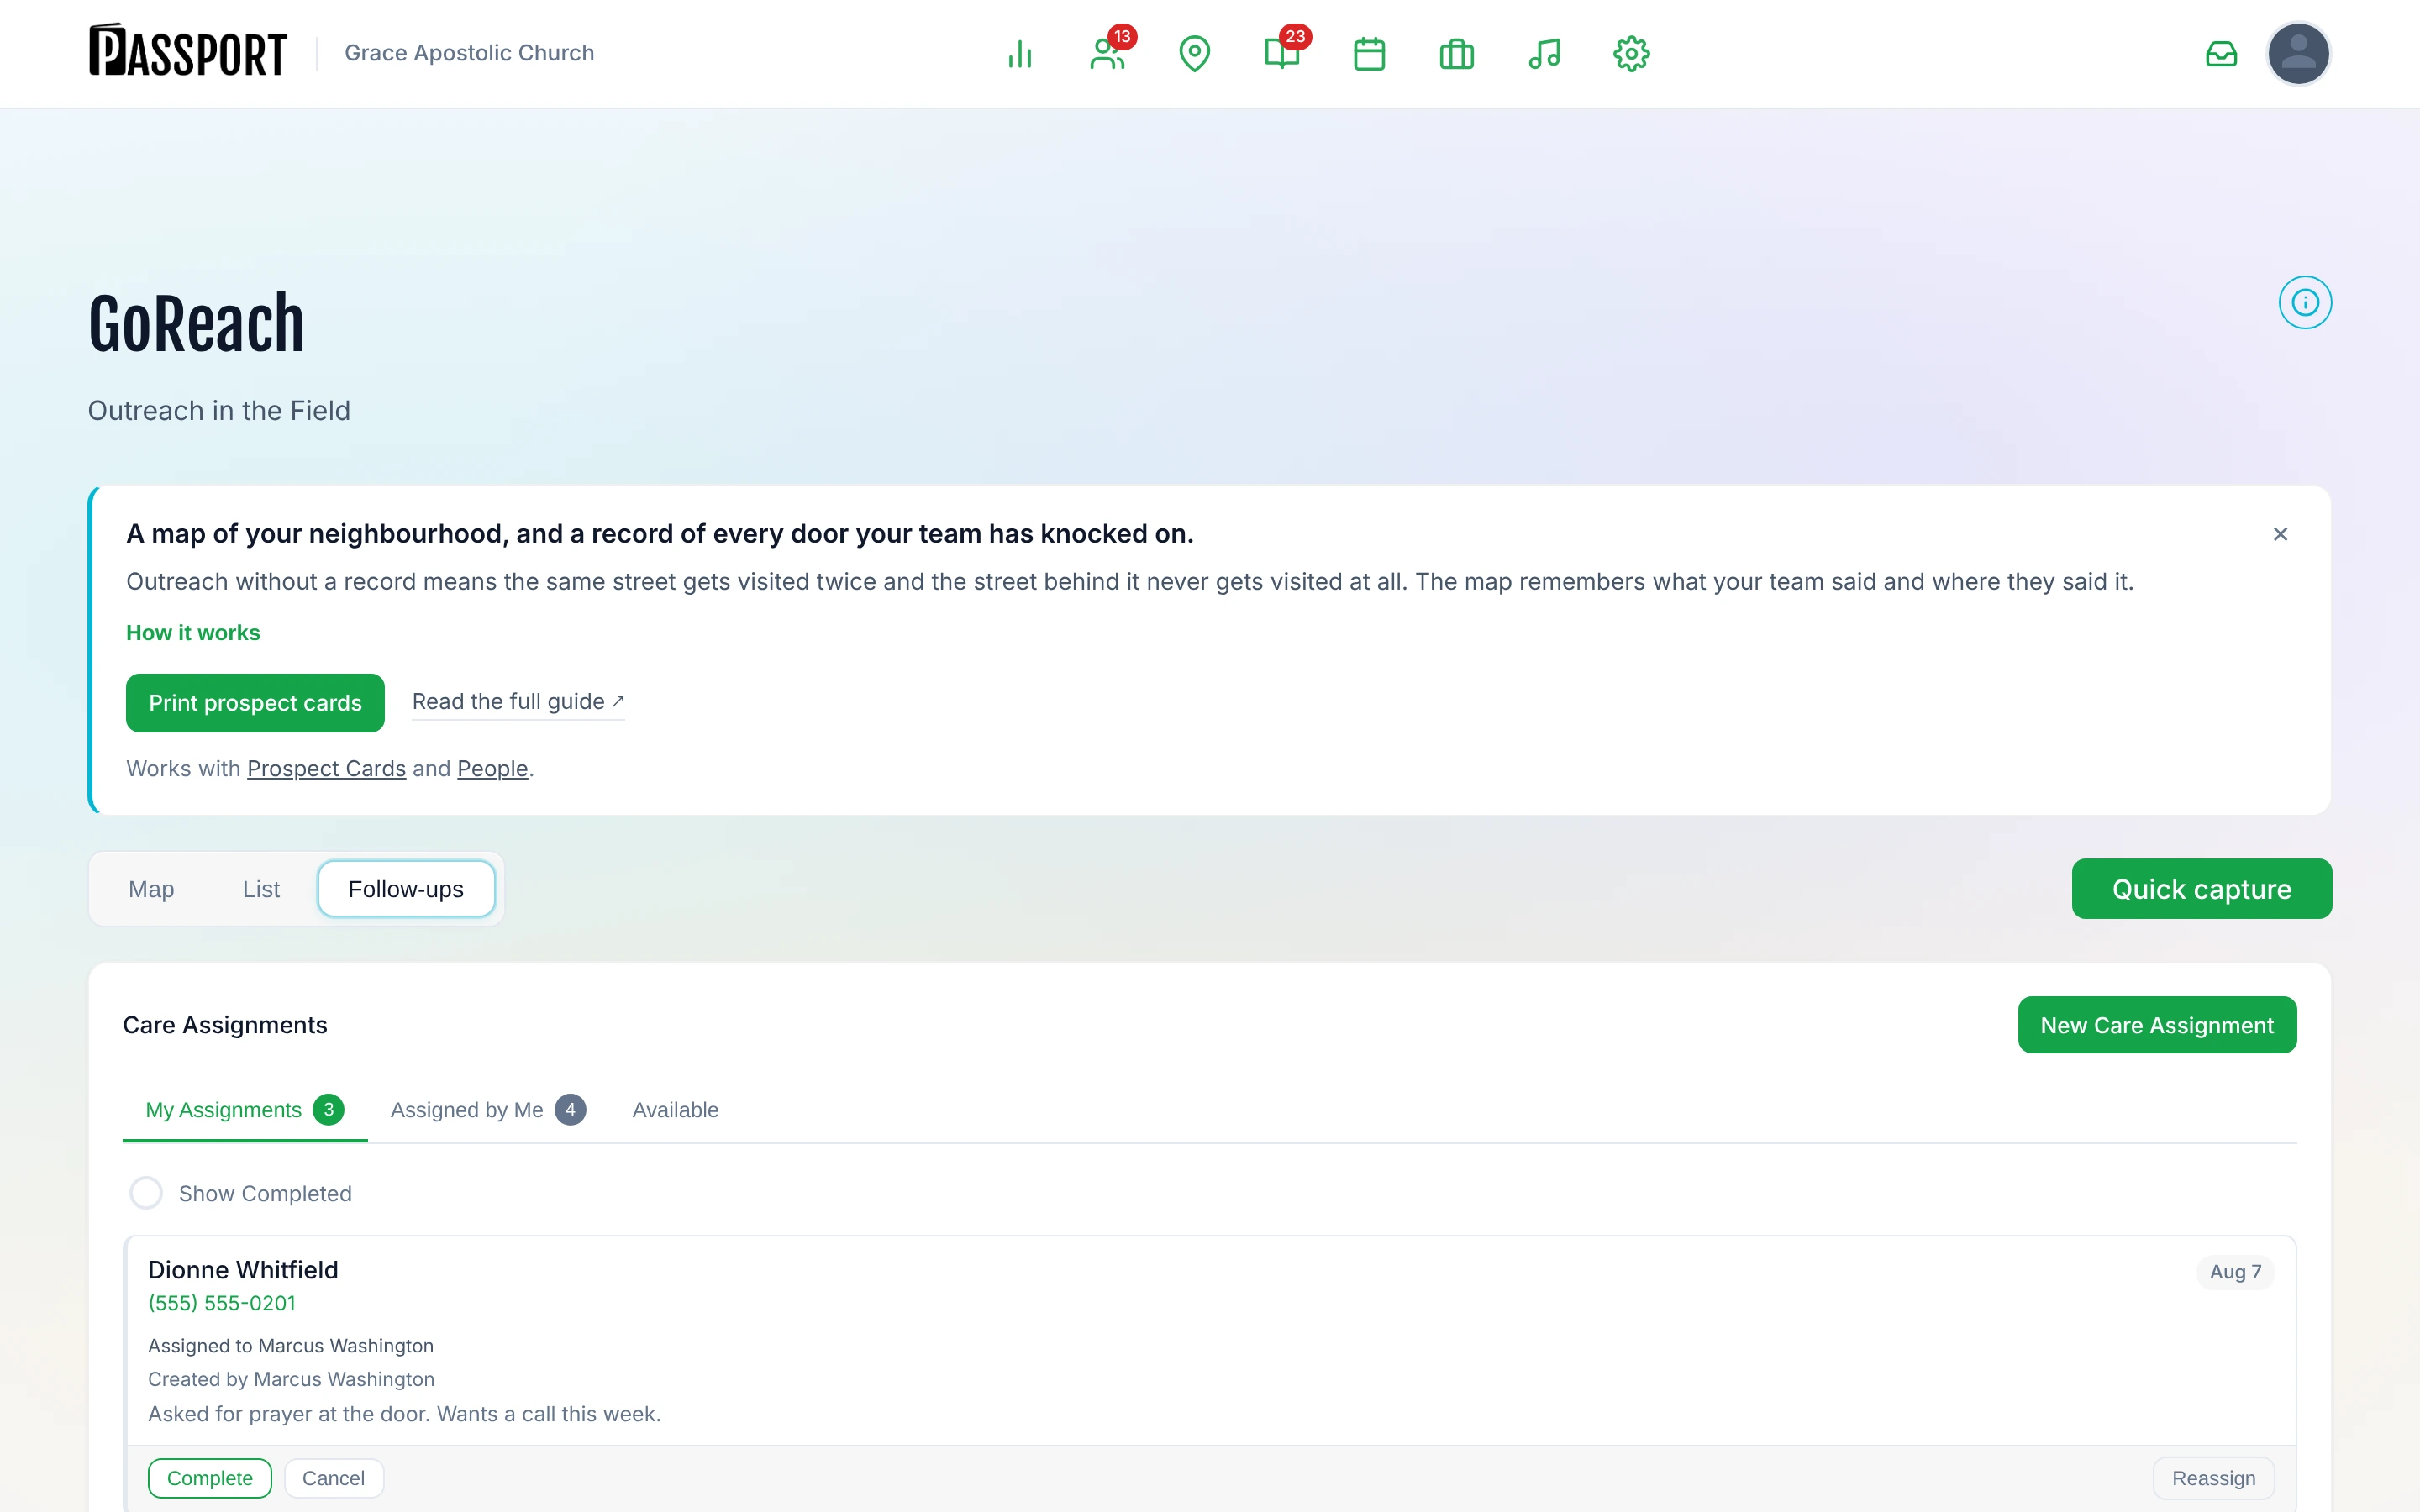
- Select the Prospect Follow-Ups tab at the top of the GoReach dashboard.
The page shows three tabs: My Assignments, Assigned by Me, and Available.
Understand the three tabs
| Tab | What it shows |
|---|---|
| My Assignments | Follow-up tasks assigned directly to you. |
| Assigned by Me | Tasks you created and assigned to others — useful for tracking your team's workload. |
| Available | Unassigned tasks routed to a ministry or group that anyone on that team can claim. |
Each tab defaults to showing only active tasks. Toggle Show Completed at the top of the list to include finished and cancelled tasks.
Create a follow-up manually
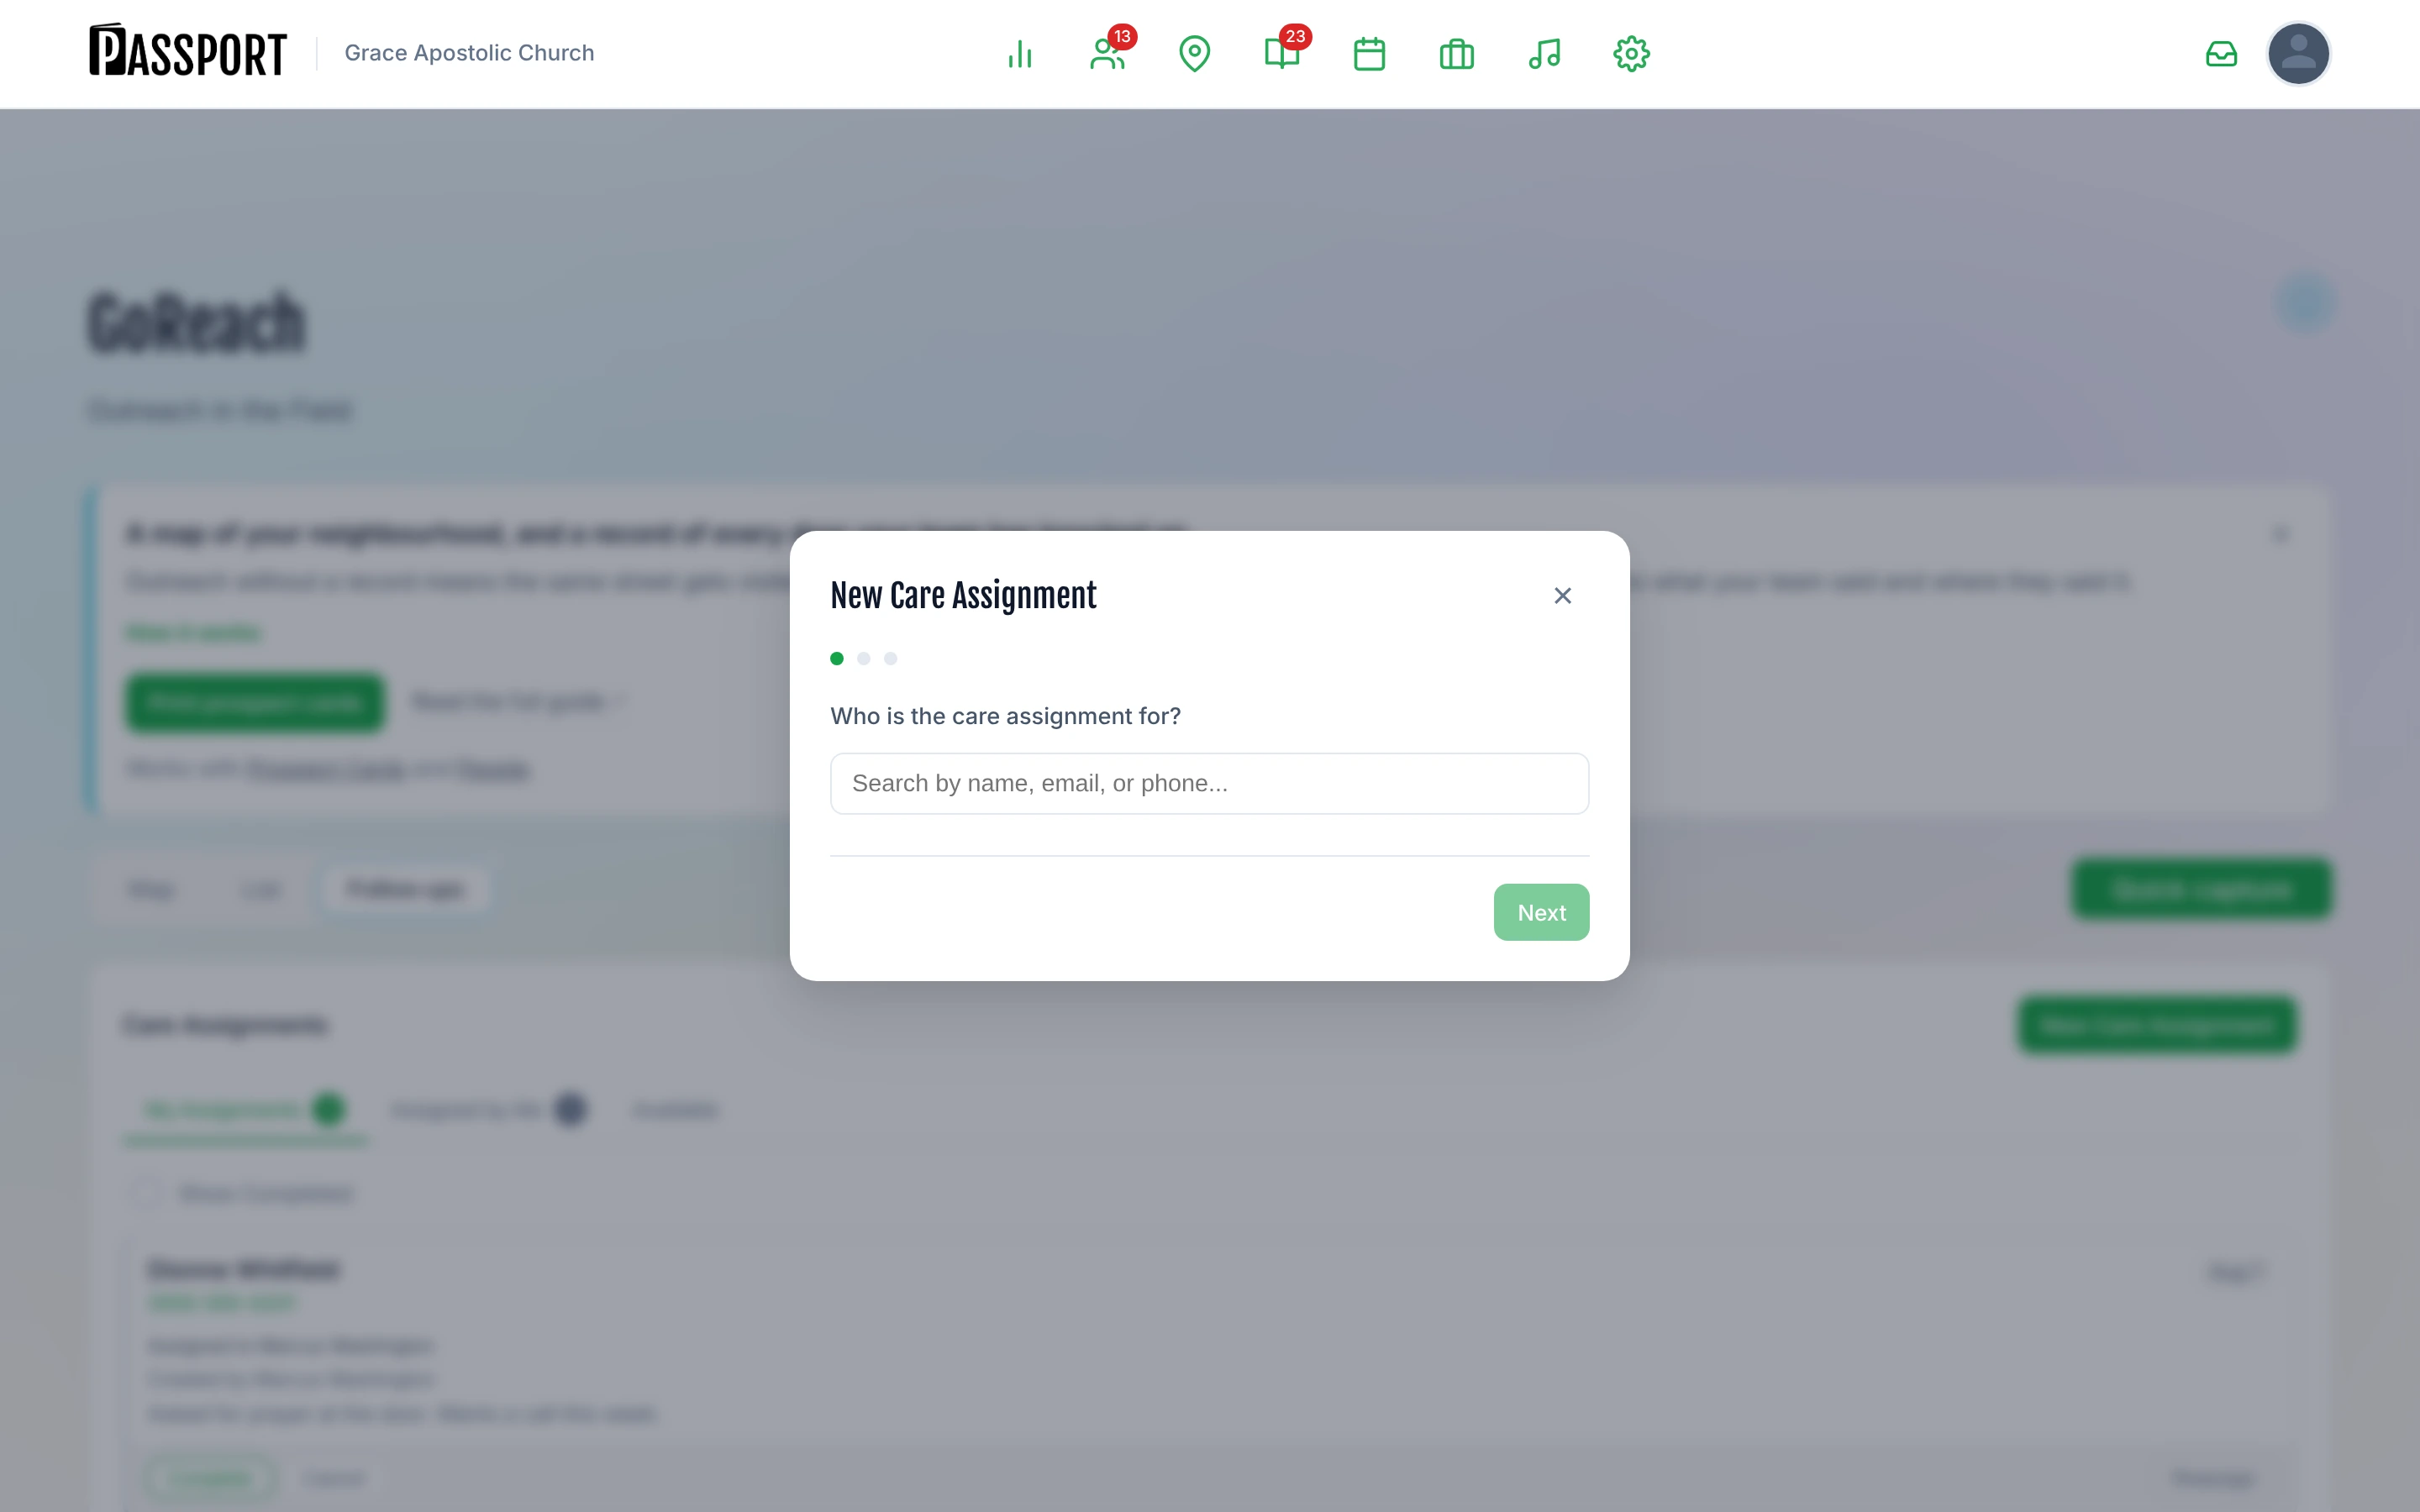
- On the Prospect Follow-Ups tab, click New Care Assignment.
- Step 1 — Person: Search for the prospect by name, email, or phone. Select them from the results.
- Step 2 — Assignee: Choose who will handle the follow-up:
- Staff — search for a specific church user
- Ministry — route the task to a ministry team (any member can claim it)
- Group — route it to a small group
- Step 3 — Notes & Deadline: Optionally add context notes and set a due date. The default deadline is seven days from today.
- Click Create to save the assignment.
The task appears in the assignee's My Assignments tab, or in Available if you chose a ministry or group.
:::tip Quick follow-up from the dashboard If your church recently had visitors, you may see a New Visitors This Week strip on the GoReach dashboard. Click Follow Up next to a visitor's name to open the same form with that person already selected. :::
How follow-ups are created automatically
When anyone on your team logs an outreach interaction — a door knock, prayer, street conversation, or other contact — they can set a follow-up date on that interaction. When they do, Passport creates a follow-up task immediately, assigned to the person who recorded the interaction.
There is nothing extra to do. The task shows up in My Assignments for the staff member who logged the interaction.
Take action on a follow-up
Each task card shows the prospect's name, contact details, assignee, any notes, and a deadline indicator (overdue tasks are highlighted in red).
Complete a task
Click Complete on the task card when the follow-up is done. Passport marks it complete and plays a brief confirmation animation.
Cancel a task
Click Cancel if the follow-up is no longer needed. Passport asks you to confirm before removing it.
Reassign a task
Click Reassign to change who handles the follow-up. You can switch to a different staff member, ministry, or group.
Claim or unclaim an available task
Tasks assigned to a ministry or group appear in the Available tab for every member of that team.
- Click Claim to take personal ownership. The task moves to your My Assignments tab.
- If you no longer need to own it, click Unclaim to return it to the shared pool.
Understand prospect pipeline stages
Each prospect's current stage is determined by their most recent outreach interaction. These stages appear on the GoReach map and list views.
| Stage | What it means |
|---|---|
| New | No interactions have been logged yet. |
| Contacted | At least one interaction was logged, but no follow-up date was set. |
| Follow-up due | A follow-up is scheduled for today or a future date. |
| Follow-up overdue | The scheduled follow-up date has passed without a recorded contact. |
| Converted | The prospect has attended a church service, so they are now a Visitor. Converting is what changes their person type — see Prospect and Visitor. |
| Declined | The prospect indicated they are not interested. |
Logging a new interaction updates the prospect's stage automatically.
Next steps
- Map view — See where your prospects live and identify clusters. Open the Map tab in GoReach.
- Coverage Heatmap — Visualize which neighborhoods your church is already reaching. See Coverage Heatmap.
- Nearby View — Find prospects near a specific address for targeted visits. See Nearby View.